


I will say that this is NOT the professional way to do this. I will share with you what I did and what I wish I changed.
Are you ready?
Ok first go to Hobby Lobby when they have the half price off of their picture frames.
I got 8x10 frames, now I kind off wish I went with the 11x14.

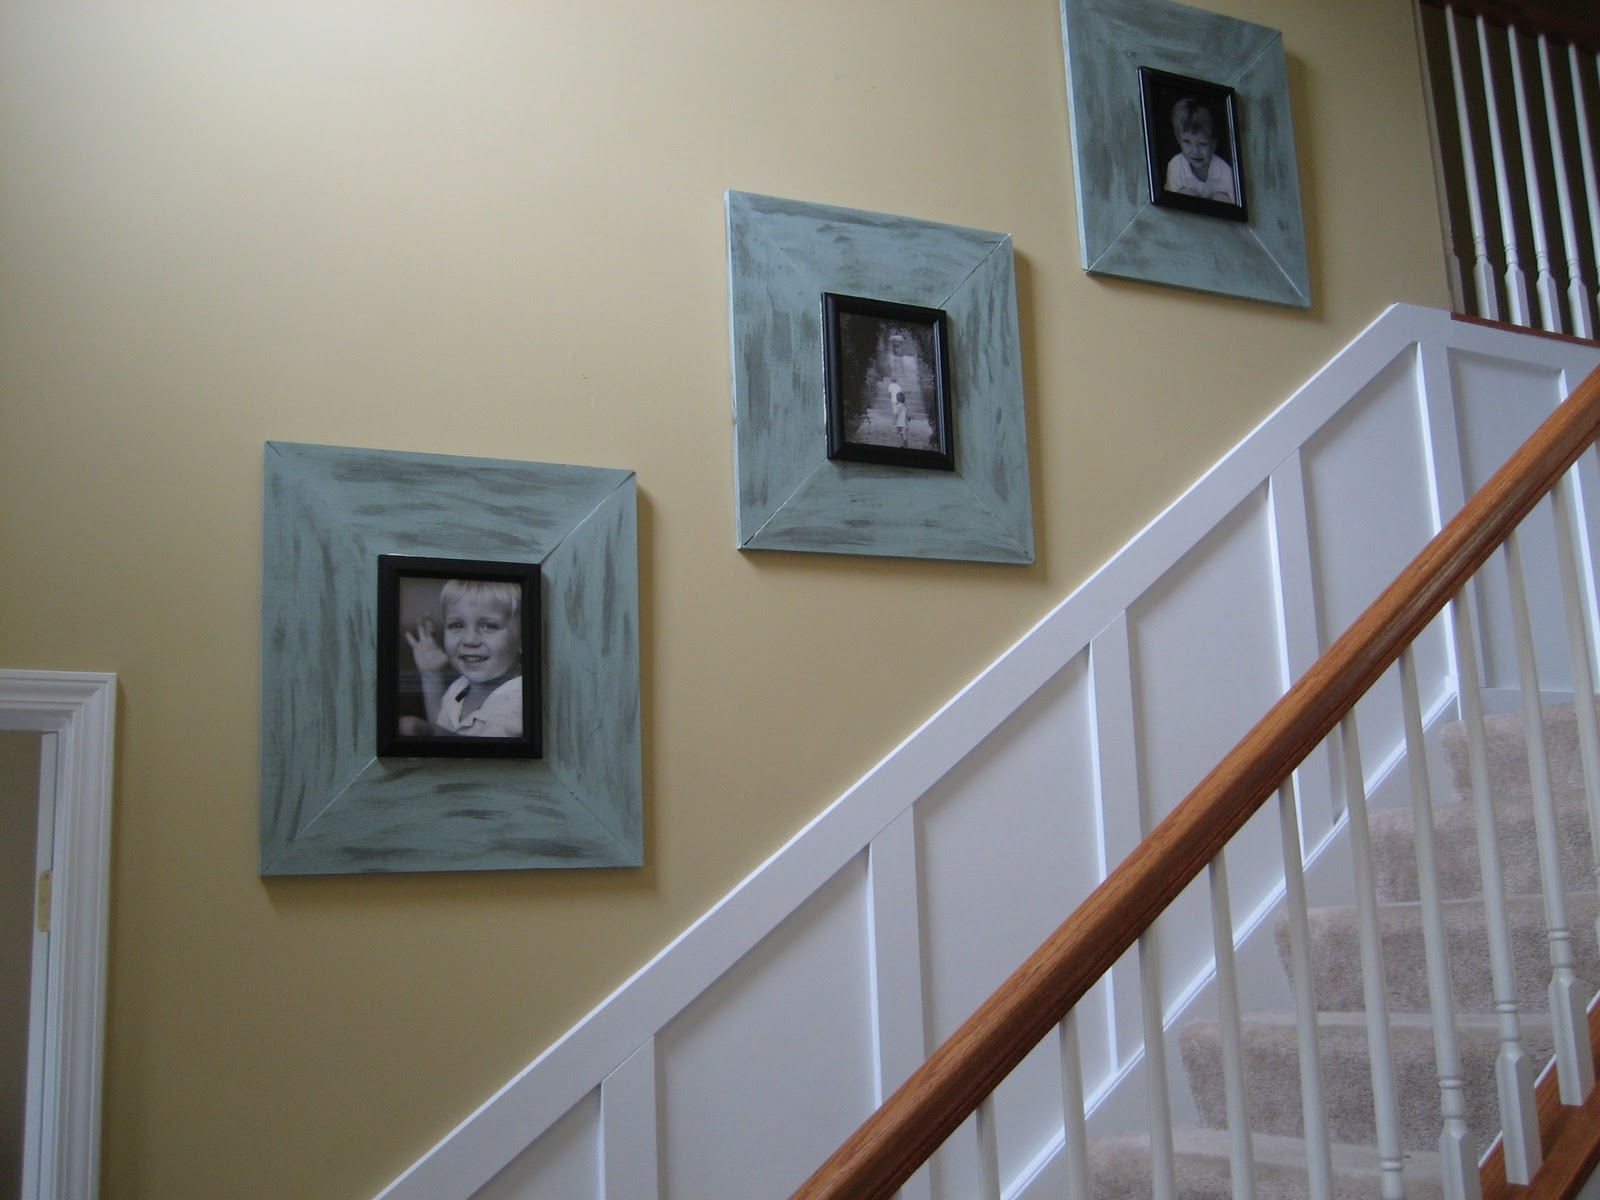
Don't hang them on your wall unless you want some extra motivation to quickly change those dinky skinny frames into nice big chunky ones.
And don't leave your hammer one your steps...trust me it will keep you from having a near panic attack.
Then go and buy some boards. I went with 1x8 boards.
Now I only have a 10" miter saw...apparently 8" boards are too big for a 10" miter saw.
Now you see how clueless I am. Are you sure you wanna hear the rest of what I have to say?
So I got my circular saw out, and made a mess.

Then I recruited some little helpers to paint.


I painted it my fav Halycon Green. The can is almost out so I will move on to another color.
Ok stop cheering.
Now this is where I would say do what I say and NOT what I did.
Once all the paint is dry, turn the boards over and glue them with wood glue.

After you put the glue on and before it dries get out your staple gun and staple it together from the back.


It still won't be perfect. But no worries.
Once the glue dries carefully flip the frame back over and get your caulk gun out.

Then I used my little caulk wand...atleast that is what I call it. To remove the excess caulk.

Once that dries paint over the caulk, then I went on and glazed the frame too.
Then next part is attaching the Hobby Lobby frame to the frame you have just made.
At first I wanted to nail it to together, but Mr. Genius thought that since the Hobby Lobby frame was thin that it would crack. So I went the super glue route.
I got my Gorilla Super glue and put a thin line around the edge of the inside of the frame.

Then place your Hobby Lobby frame on top and do NOT be impatient and pick it up too soon.
Trust me.
I had to super glue three times on one frame.
Once they are dry and ready to be hung up then go for it!
Now enjoy your frames!


Posting to:

You need a blog redesign? Go and check out Kassie!


34 comments:
LOVE this idea!!! I'm definitely going to have to make some for our new house!!!
Awesome!!!! Thanks so much for the tutorial!!!
LOVE this!! I love the look- but can not fathom paying almost $100 each for them! GREAT idea! :)
Love em!!!I am going to have to try this as well! TFS! Hugs & Smiles, Dannette
what a great project - I love how your kids got in on the action. They turned out great!
Beautiful and timely. I need this.
Love! Love! Love!!! Especially the color! (and you thought we'd be cheering that you are almost out)
I so wish I had more creative ability to come up with things like this!
Gorgeous!
Love the chunky frames and the color--don't ditch it yet!
These are awesome! They look fabulous!!
This is brilliant!! I have been wanting to make chunky frames ans I have a miter saw for the cuts. But I didn't know how to put the whole thing together. I will have to try your technique. Your frames look great!!
LOVE this!
This is a super idea. I love how the frames turned out. The color is great.
I just stopped by from TCB's Get Your Craft On.
Ruth
I ADORE these!!! I am going to get family pictures done in a few weeks and going to make some of these to put them in! Thanks for sharing!!!
www.mandibeingcrafty.blogspot.com
Perfect timing, I've been looking for a way to upcycle some old wood scraps into frames.
sunshinequeen.wordpress.com
THANK YOU for that tutorial! I have been wanting to do something like that and now, thanks to you, I think I will give it a try!
I love this idea!! I have bought chunky frames for my house because I like the look so much...should have made them lol. New follower btw. Please check out my blog for book club if you are interested--connie, measuredbytheheart.blogspot.com
Oh I love how big they are!! And the blue- {LOVE}!! Fabulous job!
I love them. I've been dying to try out our new miter saw. Now, I have just the project to try! Thanks!
Those are awesome! I love how chunky they are! They make such a difference on your stairway! I highlighted them last night at somedaycrafts.blogspot.com
I am so happy I fund this at Domestically Speaking. I bought some 1 x 6 boards a few weeks ago to make a mirror frame and hope to get started tomorrow. This tutorial is just what I needed. Thanks for sharing!
messymimi.blogspot.com
Wow, this looks lovely. Hope to see you at My Dream Canvas.
Those look fantastic! You did a great job. I am going to remember this project for filling up empty wall space.
www.itsybitsypaperblog.com
This is a great idea! I am going to use this to guide my new frame project. Thanks for sharing! :)
They turned out great. Coming from someone who makes and sells chunky frames professionally - Thumbs up to YOU!
Your frames are great and the bigger ones look so much better on the wall!
Saving this idea - you are so smart! Love it!
Great job! What a transformation!
what a great idea. so pretty. those large frames are so expensive it adds up fast. this is a much better idea.
megan
craftycpa.blogspot.com
I am in love with chunky frames too and am not about to take out a second mortgage to buy some. Great tutorial and I am impressed that you used a circular saw and miter saw!
Brilliant! Love these!
Found you on UBP'11! Your chunky frames are just awesome!!!!!!! I am now following you and so glad I found you!
~ Wendy @ www.choosinglove.net
Fantastic job! Love the chunky frames. What glaze did you use?
Marie
www.roadsiderelicsonline.blogspot.com
Great idea. Thanks for sharing!
Hmm… Maybe it is also good to add some other decorations on the picture frames - some beads would be nice! Adding some modifications would make it look lovelier, don't you think?
Zymeth Blues
Post a Comment